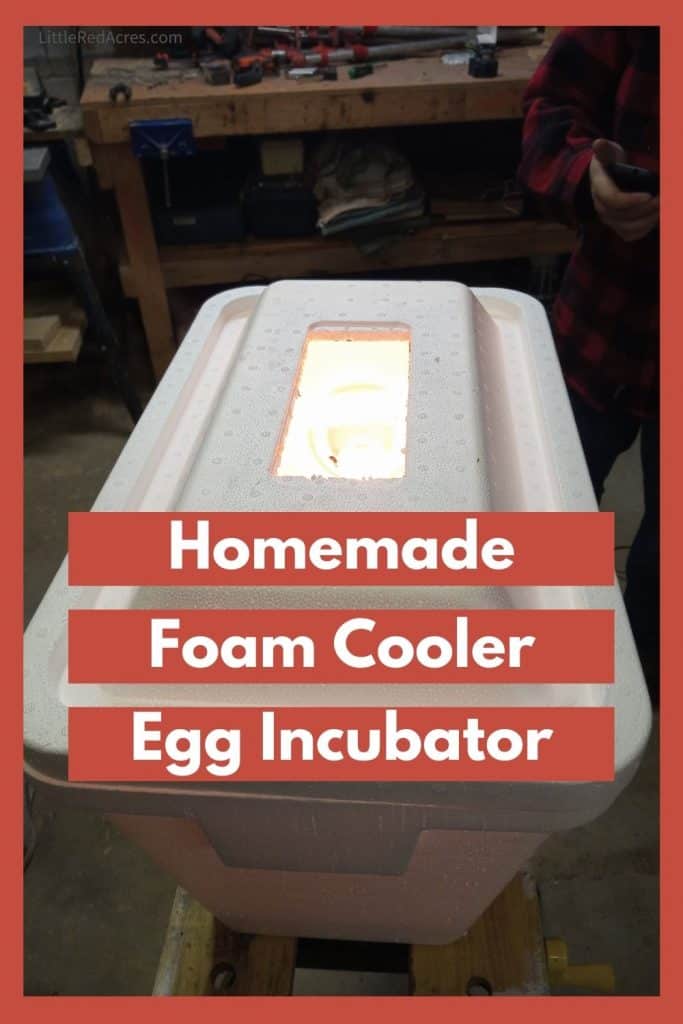
Homemade Foam Cooler Egg Incubator
Inside: Incubators can be costly, but you can make your can make a homemade foam cooler egg incubator for a fraction of the cost.
Incubators can be costly, even for a small, manual incubator that doesn't have any of the fancy bells and whistles like turners, temperature, and humidity control. You can make a homemade foam cooler egg incubator for a fraction of the cost.
This post may contain affiliate links, see my disclosure policy for more information.
Homemade Foam Cooler Egg Incubator
We have a small 16-chicken egg incubator. But what happens when you want to hatch more than 16 chicken eggs? Or you want to hatch chicken eggs in one incubator and you also want to hatch quail eggs.
Instead of spending another $90 (CAD) for another small incubator, we made one for $42 (CAD), we did have some things already such as the materials for the raised platform wood and the cooling rack from the dollar store.
Get updates & freebies delivered to your inbox!
Making A Foam Cooler Egg Incubator
Basic wiring knowledge is required. Or you can find a YouTube video to learn how to do it. Blake did all the work, yes I could probably figure it all out on my own, but he builds my dreams, even though this one was his idea.
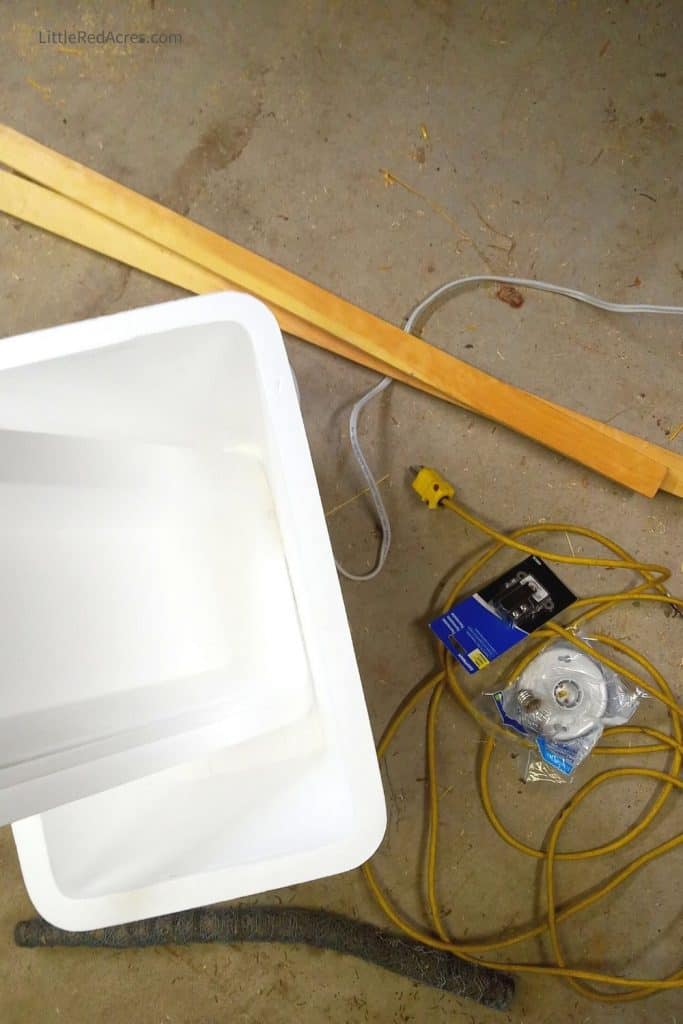
What you need:
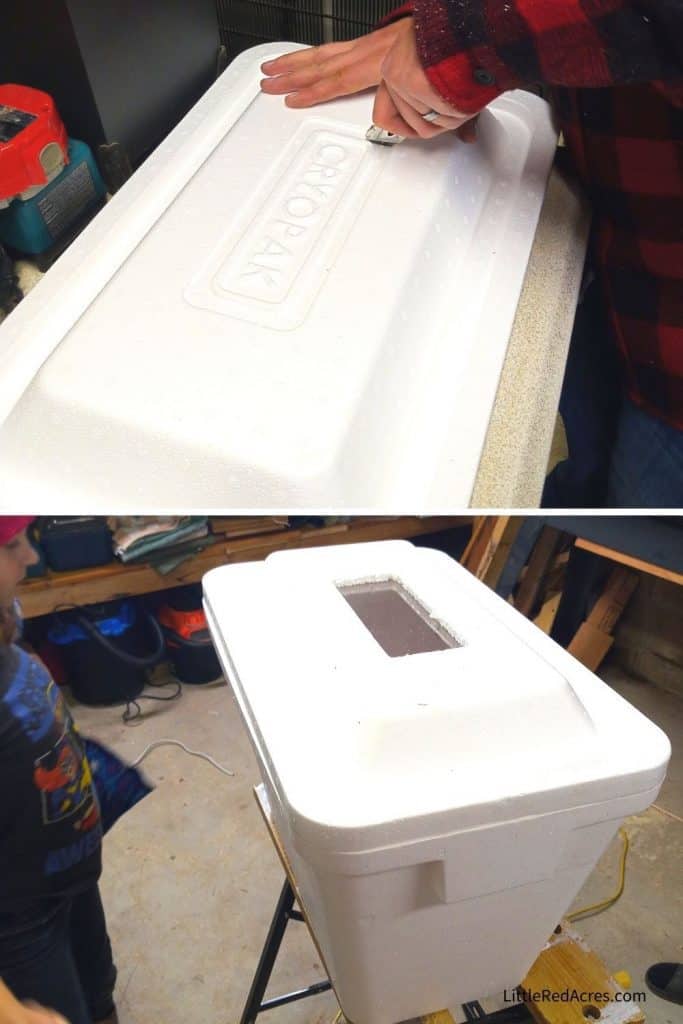
- foam cooler with lid – we bought ours at a grocery store
- scrap wood for the platform frame
- chicken wire
- 3-prong plug cord
- thermostat
- ceiling base
- plexiglass
- small fan
How to Make An Egg Incubator
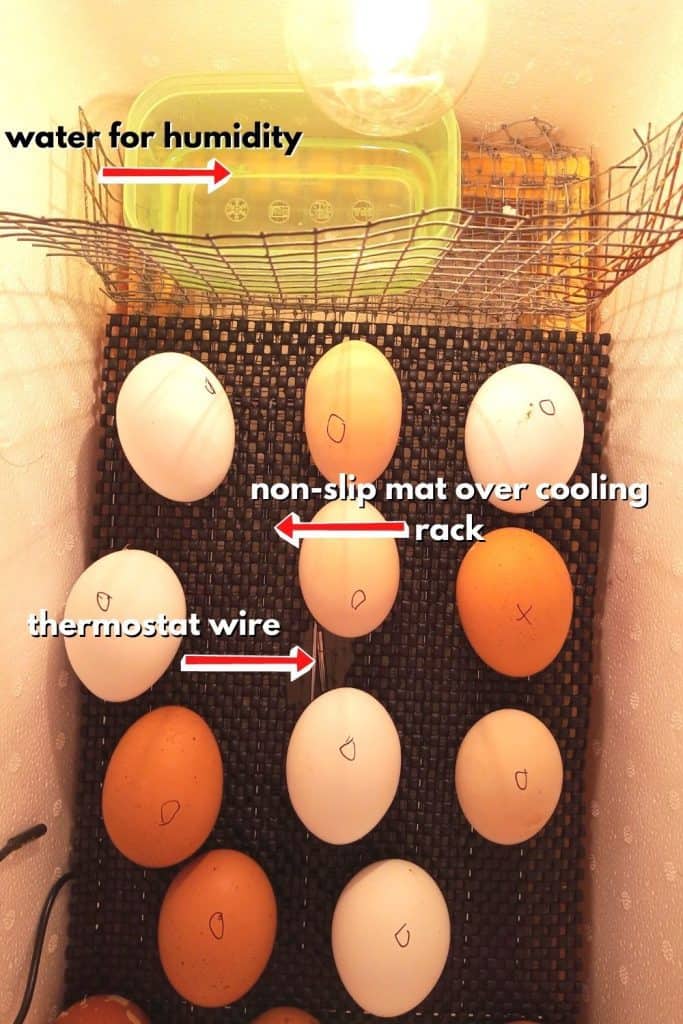
Measure the base to build a raised platform from scraps of wood. You then attach the chicken wire to the platform. We also needed to cut a cooling rack to size to give it a more solid platform on which to sit the eggs on.
On one end trace and then cut a hole to fit the ceiling box to the end of the foam cooler about halfway up. You are going to route the wires to the light fixture.
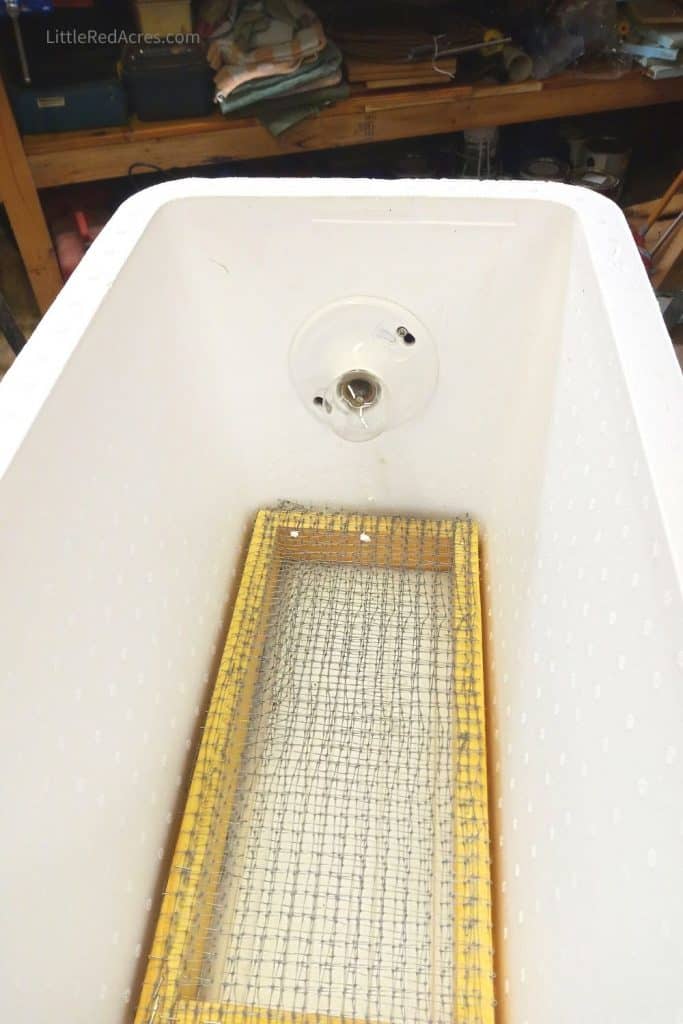
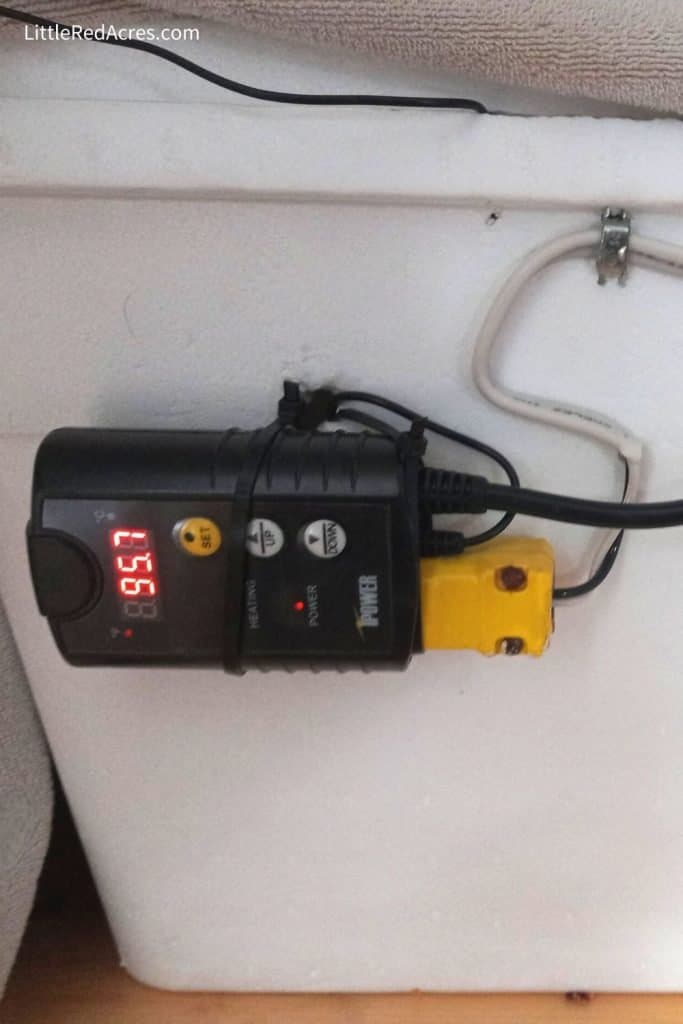
Add a half-inch hole to the side of the cooler where you will attach the thermostat to the side of the cooler with cable ties. Run the temperature wire through the hole to the inside of the cooler. Place in the platform.
Cut a viewing window in the lid. The bigger the window the more viewing space you will have, but also have more surface area without insulation and lose more heat.
Tape the plexiglass into place.
We have a non-slip shelf liner on our base to prevent the eggs from shifting when we move the incubator on the counter.
You can also add a piece of chicken wire to block off the area where the light bulb is, just to make sure that little chicks won't be able to touch the hot light bulb when hatching.
Make sure to add a dish or sponge with water for humidity. Make sure you are topping it up every few days.
Edit: we also added a small fan to help the air/heat circulate within the incubator. In our first hatch, the eggs in the middle developed and hatched but the ends did not. Adding a fan gives us a great incubation success rate.
You may want to get an additional thermometer to make sure the thermostat is running at the right temperature for hatching eggs. Ours seems to be running 2 degrees higher than I need so I gave myself time to adjust.
How to Use A Styrofoam Incubator
We currently have had better success with the homemade incubator than we have with the one we bought.
Tips for using your DIY incubator:
- keeping the humidity up for hatch/lockdown can be difficult, I recommend a sponge soaked in water to help keep levels where they should be.
- make sure to run your new incubator for a day before you add your eggs so you know that it is running correctly.
- place it in an area where the temperatures stay consistent around the incubator
- use a non-slip shelf liner to keep eggs from rolling around
Remember that your hatch rates depend on a few factors. This includes fertilization in your chickens, so while I have great hatch rates in our homemade incubator, you may not right away. I have 7-8 hens per rooster here, my roosters are getting to all of their ladies.
Cleaning Your Foam Incubator
Maintaining the cleanliness of your styrofoam incubator is crucial for the health and well-being of your eggs or chicks. Over time, bacteria and other harmful microorganisms can accumulate in the incubator, putting your hatchlings at risk of infections or diseases.
Frequently Asked Questions
What should the humidity be in a Styrofoam incubator? The relative humidity within the incubator should be maintained between 50-55%, for the first 18 days of incubation, and 65% for the last 3 days.
How do you insulate an incubator? Placing a cardboard box over the top or up under the incubator to create additional insulation can help keep the incubator warm and more consistent.

Want More?
Choosing the Right Egg Incubator
5 Easy Steps to Incubator Lockdown